
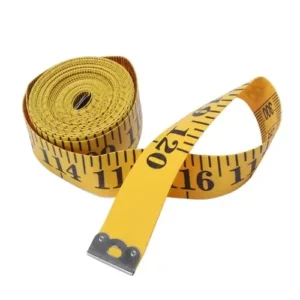
Measuring tapes are essential tools for a wide range of tasks, from home improvement projects to sewing and construction work. Among the various units of measurement, inches are commonly used in many countries, particularly in the United States. Understanding how to read a measuring tape in inches is crucial for accurately determining lengths and sizes.
To read a measuring tape in inches, find the inch marks and add the fractions of an inch between them. Whether you are a beginner or simply need a refresher, this guide will walk you through the process of interpreting the markings on a measuring tape to obtain precise measurements in inches.
By mastering this skill, you will gain the confidence and accuracy needed to tackle various projects with ease. Let’s delve into the world of measuring tapes and uncover the secrets of reading measurements in inches.
Reading a measuring tape in inches
Measuring tapes are versatile tools used in a wide array of applications, ranging from carpentry and construction to crafting and home improvement projects. Whether you’re measuring a piece of wood for a furniture project or determining the length of a fabric for sewing, understanding how to read a measuring tape in inches is essential.
Here are the basics and techniques on how to read a measuring tape in inches:
- Find the inch marks. The inch marks are the longest lines on the measuring tape. They are usually labeled with numbers, starting from 1 and increasing by 1 for each inch.
- Add the fractions of an inch between the inch marks. The fractions of an inch are the shorter lines between the inch marks. They are usually labeled with fractions, such as 1/2, 1/4, and 1/8.
- Read the measurement from the left to the right. Start by reading the inch mark that is closest to the 0 mark. Then, add the fractions of an inch that are between the inch marks.
For example, if the measuring tape is pointing to the mark between the 3-inch mark and the 4-inch mark, and there is a 1/4-inch mark between the two inch marks, the measurement would be 3 1/4 inches.
Understanding the markings on an inch measuring tape
An inch measuring tape is a tool used to measure distances in inches. It is typically made of metal or plastic and has a long, thin blade with markings that indicate the measurement in inches. The blade is usually retractable, making it easy to store and transport.
The markings on an inch measuring tape are typically in two sizes: large and small. The large markings indicate the measurement in inches, while the small markings indicate the measurement in fractions of an inch. The most common fractions of an inch that are marked on a measuring tape are 1/2, 1/4, 1/8, and 1/16.
To read an inch measuring tape, first find the measurement that you want to read. The large markings will indicate the measurement in inches, while the small markings will indicate the measurement in fractions of an inch. For example, if you are measuring a distance of 3 1/2 inches, you would find the 3-inch mark on the blade and then add the 1/2-inch mark.
How to accurately measure in inches using a tape measure
To accurately measure in inches using a tape measure, follow these steps:
- Ensure that your tape measure is in good condition, with clear and visible markings. If the markings are worn out or faded, it may be challenging to obtain accurate measurements.
- Start by identifying the beginning of the object or distance you want to measure. Align the end of the tape measure with the starting point.
- Hold the tape measure firmly in place, making sure it is straight and not sagging or bending.
- Locate the nearest inch mark on the tape measure. These are usually indicated by longer, numbered lines. Each inch is typically divided into smaller markings, which represent fractions of an inch (e.g., 1/2 inch, 1/4 inch).
- Read the measurement by identifying the inch mark that aligns with the end of the object or distance you’re measuring. Take note of the whole number of inches.
- For greater precision, check the fractional markings on the tape measure. Determine if the end of the object falls between two fractional markings, such as halfway between 1/2 inch and 3/4 inch.
- Estimate the fractional measurement by visually dividing the space between two fractional markings into equal parts. Make an educated guess based on the position of the end of the object or distance you’re measuring. For example, if the end falls closer to the 1/2 inch marking, you can estimate it as 1/2 inch.
- Combine the whole number of inches and the estimated fractional measurement to obtain the total measurement in inches. For example, if you measured 7 whole inches and estimated 1/2 inch, the total measurement would be 7 1/2 inches.
- Double-check your measurement to ensure accuracy. If needed, measure again to confirm the result.
Remember to use steady hands and ensure the tape measure is securely positioned for precise measurements. Practice and experience will help you become more proficient in accurately measuring in inches using a tape measure.
Tips for reading fractions on an inch measuring tape

Here are some tips for reading fractions on an inch measuring tape:
- Identify the inch marks. The inch marks are the large, evenly spaced marks on the tape measure. They are typically labeled with numbers from 1 to 12.
- Identify the fractional inch marks. The fractional inch marks are the smaller, irregularly spaced marks on the tape measure. They are typically labeled with fractions of an inch, such as 1/2, 1/4, 1/8, and 1/16.
- Count the number of inch marks between the fractional inch marks. The number of inch marks between the fractional inch marks indicates the value of the fraction. For example, if there are two inch marks between the 1/2-inch mark and the 1-inch mark, then the fraction is 1/4.
- Add the value of the fraction to the nearest inch mark. To read the measurement, add the value of the fraction to the nearest inch mark. For example, if the 1/4-inch mark is aligned with the 2-inch mark, then the measurement is 2 1/4 inches.
Decoding the numbers and increments on an inch measuring tape
On an inch measuring tape, there are typically several components and increments that allow for accurate measurements. Let’s decode them:
- Inch Marks: The inch marks are the main reference points on the tape measure. They are usually indicated by longer lines and labeled with whole numbers, such as 1, 2, 3, and so on, representing inches.
- Fractional Markings: Between each inch mark, there are smaller markings that represent fractions of an inch. These fractional markings allow for more precise measurements. The most common fractional markings include:
- 1/2 inch: This is usually represented by a slightly longer line compared to the other fractional markings. It divides an inch into two equal parts.
- 1/4 inch: It is indicated by a shorter line compared to the 1/2-inch mark. An inch is divided into four equal parts, with each part representing 1/4 inch.
- 1/8 inch: This mark is smaller than the 1/4-inch mark. It divides an inch into eight equal parts, with each part representing 1/8 inch.
- 1/16 inch: This is the smallest marking on most inch measuring tapes. It divides an inch into 16 equal parts, with each part representing 1/16 inch. These markings can be quite close together, so careful observation is required.
- Numbered Increments: In addition to the whole numbers and fractional markings, you may also find numbered increments on some tape measures. These increments provide finer divisions within each inch, allowing for even more precise measurements. For example, you may see numbers like 1/32 inch or 1/64 inch labeled on the tape measure. These increments are usually indicated by very small lines or numerals.
By combining the whole numbers, fractional markings, and numbered increments, you can accurately measure distances or objects in inches using an inch measuring tape. Pay attention to the specific markings and increments on your tape measure, as they may vary slightly depending on the manufacturer or model.
Step-by-step guide to reading a measuring tape in inches
Here’s a step-by-step guide to reading a measuring tape in inches:
Step 1: Familiarize Yourself with the Tape Measure Take a look at the measuring tape and locate the zero point. This is typically found at the metal or plastic end of the tape. It’s important to start your measurements from this point.
Step 2: Understand the Increment Markings Most measuring tapes have incremental markings that represent different units of measurement. In this case, we’ll focus on inches. Each inch is typically divided into 16 smaller markings, which represent sixteenths of an inch. Additionally, you’ll often find longer markings at the inch and half-inch points.
Step 3: Identify the Whole Inch Measurement To measure an object, place the zero point of the measuring tape at one end of the object. Stretch out the tape and locate the point where the object ends. Read the whole inch measurement that aligns with this point. For example, if the end of the object aligns with the mark labeled “5,” the whole inch measurement is 5.
Step 4: Determine the Fractional Inch Measurement Once you’ve identified the whole inch measurement, look at the smaller markings between the whole inch numbers. Count the number of smaller markings between the whole inch mark and the point where the object ends. Each of these smaller markings represents one-sixteenth of an inch. For example, if you count three smaller markings, the fractional inch measurement is 3/16.
Step 5: Combine the Whole Inch and Fractional Inch Measurements To get the final measurement, combine the whole inch and fractional inch measurements. In our example, if the whole inch measurement is 5 and the fractional inch measurement is 3/16, the total measurement is 5 3/16 inches.
Step 6: Take Note of any Additional Markings Some measuring tapes may have additional markings, such as half-inch or quarter-inch markings. If your measurement aligns with one of these markings, simply include it in your final measurement. For example, if the object aligns with the mark labeled “5 1/2,” your measurement would be 5 1/2 inches.
By following these steps, you should be able to read a measuring tape in inches accurately.
Identifying the zero point on an inch measuring tape
The zero point on an inch measuring tape is the point where the numbers start. It is usually marked with a small 0, or a pair of 0s, and is located on the left side of the tape. The zero point is used to start measuring distances, and is also used to check the accuracy of measurements.
To identify the zero point on an inch measuring tape, follow these steps:
- Hold the tape measure in your hand so that the numbers are facing you.
- Locate the small 0, or pair of 0s, on the left side of the tape.
- This is the zero point.
Once you have identified the zero point, you can use it to start measuring distances. To do this, simply line up the zero point with one end of the object you are measuring. Then, read the number on the tape measure that is directly opposite the other end of the object. This is the measurement in inches.
You can also use the zero point to check the accuracy of measurements. To do this, simply measure the same object twice. If the two measurements are different, then one of the measurements is incorrect. In this case, you should repeat the measurement until you get two identical measurements.
Mastering the art of measuring with an inch tape measure
Mastering the art of measuring with an inch tape measure requires practice and attention to detail. Here are some tips to help you become proficient:
Understand the Basics:
-
- Familiarize yourself with the different components of the tape measure, such as the zero point, inch markings, and smaller fractional markings.
- Learn how to read whole inches, half inches, and fractional inches (e.g., eighths, sixteenths) accurately.
Handle the Tape Measure Correctly:
-
- Hold the tape measure firmly and extend it fully for accurate measurements.
- Make sure the tape is straight and not twisted or bent.
Start at the Zero Point:
-
- Begin your measurement from the zero point of the tape measure. Align it with the edge of the object you want to measure.
Take Whole Inch Measurements:
-
- Determine the whole inch measurement by identifying the number on the tape measure that aligns with the end of the object.
- Read the whole inch measurement directly from the tape, ensuring that you are aligned vertically with the marking.
Measure Fractional Inches:
-
- Locate the smaller markings between whole inch numbers to determine the fractional inch measurement.
- Count the number of smaller markings between the whole inch mark and the end of the object.
- Identify the corresponding fractional measurement based on the increment represented by each smaller marking (e.g., 1/8, 1/16).
Combine Measurements for Accuracy:
-
- Add the whole inch measurement to the fractional inch measurement to obtain the final measurement.
- Express the measurement as a whole number with the fraction if applicable (e.g., 5 3/8 inches).
Pay Attention to Additional Markings:
-
- Some tape measures have extra markings such as half-inch or quarter-inch increments. Be aware of these markings and incorporate them into your measurements when applicable.
Double-Check and Verify:
-
- Always double-check your measurements to ensure accuracy.
- Take multiple measurements of the same object to ensure consistency.
Practice and Refine Your Technique:
-
- Practice measuring various objects of different sizes to enhance your skills.
- Over time, you’ll become more comfortable and accurate in reading measurements with an inch tape measure.
By following these guidelines and practicing regularly, you’ll gradually master the art of measuring with an inch tape measure.
Common mistakes to avoid when reading an inch measuring tape
When reading an inch measuring tape, it’s important to be aware of common mistakes that can lead to inaccurate measurements. Here are some mistakes to avoid:
Parallax Error:
-
- Parallax error occurs when your eye is not directly in line with the measurement mark, leading to an incorrect reading.
- To avoid this, position yourself directly in front of the mark, ensuring your eye level is aligned vertically with the tape measure.
Misalignment:
-
- Ensure the zero point of the tape measure aligns accurately with the starting point of the object you are measuring.
- If the tape measure is not aligned correctly, it can result in an incorrect measurement.
Tape Distortion:
-
- Check the tape measure for any damage or distortion, such as bends or kinks.
- A distorted tape can lead to measurements that are off by fractions of an inch, affecting accuracy.
Incorrect Counting of Fractional Inches:
-
- Take care when counting the smaller markings between whole inch numbers.
- Count each smaller marking accurately to determine the correct fractional inch measurement.
Neglecting Half-Inch or Quarter-Inch Markings:
-
- Some tape measures have additional markings at half-inch or quarter-inch intervals.
- Be attentive to these markings and include them in your measurement if applicable.
Not Locking the Tape Measure:
-
- If you are unable to hold the tape measure steadily with one hand, ensure it is securely locked in place to avoid movement during measurement.
- A loose tape can lead to inconsistent readings.
Ignoring Metric Markings:
-
- Some tape measures have both inch and metric markings.
- If you are specifically measuring in inches, be cautious not to confuse the metric measurements with the inch measurements.
Failing to Double-Check:
-
- Always double-check your measurements by taking multiple measurements of the same object.
- If there are discrepancies, reevaluate your technique and confirm the accuracy of your readings.
Rushing the Measurement Process:
-
- Take your time and be patient when measuring with an inch tape.
- Rushing can lead to hasty readings and potential errors.
By avoiding these common mistakes, you can improve the accuracy of your measurements and ensure reliable results when using an inch measuring tape.
Calculating measurements with precision using an inch measuring tape
Calculating measurements with precision using an inch measuring tape requires attention to detail and a systematic approach. Here’s a step-by-step guide to help you achieve accurate measurements:
Ensure the Tape Measure is in Good Condition:
-
- Check that the tape measure is not damaged or distorted, as this could affect measurement accuracy.
- Make sure the locking mechanism is functional, allowing you to secure the tape in place.
Begin at the Zero Point:
-
- Align the zero point of the tape measure with the starting point of the object you wish to measure.
- Hold the tape measure steady and ensure it is straight and parallel to the object.
Read the Whole Inch Measurement:
-
- Identify the whole inch mark on the tape measure that aligns with the end of the object.
- Ensure your eye level is aligned vertically with the mark to avoid parallax error, which can result in inaccurate readings.
Determine the Fractional Inch Measurement:
-
- Examine the smaller markings between whole inch numbers.
- Count the number of these smaller markings from the whole inch mark to the end of the object.
- Each smaller marking typically represents a fraction of an inch, such as 1/8, 1/16, or 1/32.
Take Note of Any Additional Markings:
-
- Some tape measures may have extra markings, such as half-inch or quarter-inch increments.
- If your measurement aligns with these markings, include them in your final measurement.
Convert Fractions to Decimal Form (Optional):
-
- If you prefer working with decimal measurements, you can convert fractions to decimals.
- For example, 1/8 inch can be expressed as 0.125 inches, 1/16 inch as 0.0625 inches, and so on.
Combine Whole Inch and Fractional Inch Measurements:
-
- Add the whole inch measurement to the fractional inch measurement to obtain the total measurement.
- If you converted fractions to decimals, you can add the decimal equivalents directly to the whole inch measurement.
Verify and Double-Check:
-
- To ensure accuracy, measure the same object multiple times and compare the results.
- If discrepancies occur, reevaluate your technique and check for errors.
Record and Communicate Measurements:
-
- Write down or communicate the measurements clearly, including the whole inch measurement and any fractional or decimal components.
By following these steps and maintaining precision throughout the process, you can achieve accurate measurements using an inch measuring tape. Regular practice and attention to detail will further enhance your measurement skills.
Techniques for measuring curved surfaces with an inch measuring tape
There are a few techniques that can be used to measure curved surfaces with an inch measuring tape.
Method 1: String and Tape Measure
- Wrap a string around the curved surface.
- Mark the point where the string starts and ends.
- Cut the string.
- Lay the string flat on a surface.
- Measure the length of the string with a tape measure.
Method 2: Multiple Measurements
- Mark several points along the curved surface.
- Measure the distance between each pair of points.
- Add up all of the distances to get the total length of the curved surface.
Method 3: Flexible Tape Measure
- If you have a flexible tape measure, you can use it to measure curved surfaces directly.
- Simply wrap the tape measure around the curved surface and read the measurement.
Which Method to Use?
The best method to use for measuring curved surfaces will depend on the size and shape of the surface. For small, simple curves, Method 1 is usually the easiest and most accurate method. For larger, more complex curves, Method 2 or Method 3 may be more appropriate.
Enhancing your accuracy when using an inch measuring tape
To enhance your accuracy when using an inch measuring tape, here are some tips and techniques to follow:
Choose a High-Quality Tape Measure:
-
- Invest in a reliable and well-constructed tape measure with clear and precise markings.
- A good quality tape measure will provide accurate measurements and withstand regular use.
Use a Sturdy Surface:
-
- When measuring larger objects, place them on a stable and level surface to minimize any movement.
- This will help you achieve more accurate measurements, especially when measuring longer distances.
Check and Maintain the Tape Measure:
-
- Regularly inspect the tape measure for any damage, distortion, or wear.
- Clean the tape measure to ensure the markings are clear and easy to read.
- Replace the tape measure if it becomes worn out or the markings become illegible.
Practice Consistent Technique:
-
- Develop a consistent technique for holding and using the tape measure.
- Use the same hand and grip style to maintain consistency in your measurements.
Minimize Parallax Error:
-
- Position yourself directly in front of the measurement mark to avoid parallax error.
- Align your eye level with the mark to ensure accurate readings.
Double-Check Alignment:
-
- Ensure the zero point of the tape measure is aligned accurately with the starting point of the object.
- Make any necessary adjustments to achieve proper alignment.
Measure Twice:
-
- Take multiple measurements of the same object to verify accuracy.
- If there are discrepancies, measure again until you achieve consistent results.
Use a Steady Grip:
-
- Hold the tape measure firmly and steadily to avoid any movement or slippage during measurement.
- Use the locking mechanism if available to secure the tape measure in place.
Account for the Hook or Endpiece:
-
- Remember to consider the length of the hook or endpiece when measuring from an edge.
- The measurement should start from the edge of the object, not the beginning of the hook.
Practice with Different Objects:
-
- Measure a variety of objects to gain experience and improve your measuring skills.
- By practicing on different sizes and shapes, you’ll become more proficient in obtaining accurate measurements.
Seek Assistance when Necessary:
-
- For larger or complex measurements, consider seeking help from another person to ensure accuracy.
- Collaborative measuring can help minimize errors and provide more precise results.
By implementing these techniques and being diligent in your measuring practices, you can enhance your accuracy when using an inch measuring tape. Regular practice and attention to detail will contribute to improved measurement skills over time.
Understanding the different types of inch measuring tapes and their uses
There are several types of inch measuring tapes available, each designed for specific purposes. Here are some common types of inch measuring tapes and their uses:
Standard Inch Measuring Tape:
-
- This is the most common type of tape measure, typically available in various lengths, such as 12, 16, 25, or 30 feet.
- It features inch markings along with fractional increments (e.g., 1/8, 1/16) to measure objects accurately.
- Standard inch measuring tapes are versatile and suitable for a wide range of measuring tasks in construction, woodworking, and general household use.
Long Tape Measure:
-
- Long tape measures are designed for measuring larger distances, typically ranging from 25 to 300 feet or more.
- They are commonly used in construction, surveying, landscaping, and civil engineering projects.
- Long tape measures often have a wide tape and a winding handle for easy use and durability.
Measuring Wheel:
-
- Measuring wheels, also known as surveyor’s wheels or distance wheels, are used to measure longer distances.
- They feature a wheel with a circumference marked with inches and sometimes feet.
- Measuring wheels are frequently used by surveyors, engineers, and construction professionals for measuring roads, land, and other large areas.
Digital Measuring Tape:
-
- Digital measuring tapes use electronic technology to provide precise and digital measurements.
- They often feature an LCD display that shows measurements in inches, fractions, or decimals.
- Digital measuring tapes are convenient for quick and accurate measurements, especially when working alone or in low-light conditions.
Pocket Measuring Tape:
-
- Pocket measuring tapes are compact and portable, designed to fit in a pocket or a small tool bag.
- They are typically shorter in length, ranging from 6 to 12 feet.
- Pocket measuring tapes are useful for smaller-scale measurements, such as crafting, sewing, or measuring furniture dimensions.
Self-Adhesive Measuring Tape:
-
- Self-adhesive measuring tapes are typically tapes with inch markings that can be stuck onto surfaces.
- They are commonly used in home improvement projects, interior design, and woodworking, where precise measurements need to be applied directly to surfaces.
Specialty Measuring Tapes:
-
- There are various specialty measuring tapes designed for specific applications, such as measuring diameters, angles, or curves.
- These tapes may feature additional markings, specialized attachments, or unique design elements to accommodate specific measurement needs.
Remember to select the appropriate type of measuring tape based on your specific measurement requirements. Understanding the different types available will help you choose the right tool for the task at hand and ensure accurate measurements in your projects.
Recommended:
- How much does 4 gallons of water weigh?
- How much does a 5 gallon bucket of paint weigh?
- Standard Tumbler Size
- How many cups is 32 oz?
- What size shower curtain do I need?
Conclusion
If you need to learn how to read a measuring tape in inches, then we have all that you need on this page. To read a measuring tape in inches accurately, identify the zero point, align the object’s end with the corresponding inch mark, count the smaller markings for fractional inches, consider additional markings if present, combine the measurements, and double-check for accuracy.
